![[iOS] Naver 소셜 로그인](https://img1.daumcdn.net/thumb/R750x0/?scode=mtistory2&fname=https%3A%2F%2Fblog.kakaocdn.net%2Fdna%2F48HnG%2FbtraXTo39zI%2FAAAAAAAAAAAAAAAAAAAAAH-rxP0Y6lVk6rI0eMix_NirdQV07AptcWMQ7jfE-rnQ%2Fimg.png%3Fcredential%3DyqXZFxpELC7KVnFOS48ylbz2pIh7yKj8%26expires%3D1772290799%26allow_ip%3D%26allow_referer%3D%26signature%3DcO%252F8Bq%252Bc5xLNnDCkwVU%252Beechrjo%253D)
728x90
Naver
1. 애플리케이션 등록
https://developers.naver.com/apps/#/wizard/register

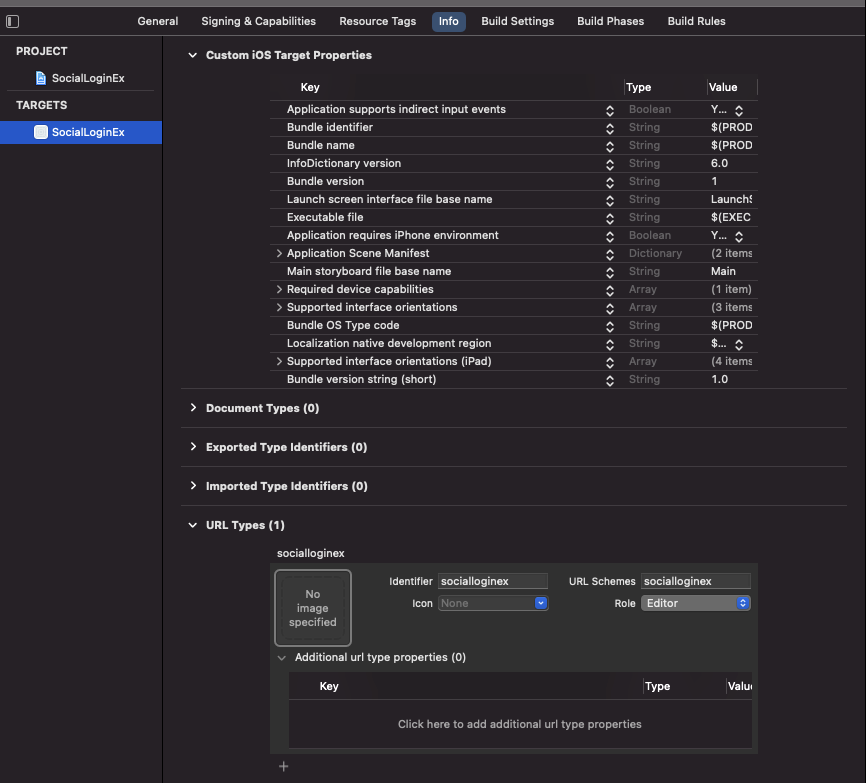
✔️ Info - URL Types - URL Scheme는 소문자로 작성하기!
✔️ 다운로드 URL는 없어서 블로그 주소로 작성함
2. 네이버 로그인 SDK 라이브러리 설치
pod 'naveridlogin-sdk-ios'
3. info.plist 추가

<key>LSApplicationQueriesSchemes</key>
  <array>
    <string>naversearchapp</string>
    <string>naversearchthirdlogin</string>
  </array>
4. 상수 설정
NaverThirdPartyConstantsForApp.h파일에 serviceUrlSchem, consumerKey, consumerSecret, appName 작성하기


5. AppDelegate.swift 수정
: 인증방식 활성화
import NaverThirdPartyLogin
class AppDelegate: UIResponder, UIApplicationDelegate {

    func application(_ application: UIApplication, didFinishLaunchingWithOptions launchOptions: [UIApplication.LaunchOptionsKey: Any]?) -> Bool {
        // Override point for customization after application launch.

        //MARK: 네이버 로그인
        let instance = NaverThirdPartyLoginConnection.getSharedInstance()

        // 네이버 앱으로 인증하는 방식 활성화
        instance?.isNaverAppOauthEnable = true

        // SafariViewController에서 인증하는 방식 활성화
        instance?.isInAppOauthEnable = true

        // 인증 화면을 아이폰의 세로모드에서만 적용
        instance?.isOnlyPortraitSupportedInIphone()

        instance?.serviceUrlScheme = kServiceAppUrlScheme // 앱을 등록할 때 입력한 URL Scheme
        instance?.consumerKey = kConsumerKey // 상수 - client id
        instance?.consumerSecret = kConsumerSecret // pw
        instance?.appName = kServiceAppName // app name

        return true
    }

    //MARK: 네이버 로그인
    func application(_ app: UIApplication, open url: URL, options: [UIApplication.OpenURLOptionsKey : Any] = [:]) -> Bool {
        NaverThirdPartyLoginConnection.getSharedInstance()?.application(app, open: url, options: options)
        return true
    }
6. SceneDelegate.swift 수정
: 토큰 요청
import NaverThirdPartyLogin
class SceneDelegate: UIResponder, UIWindowSceneDelegate {

    var window: UIWindow?

    // 네이버 로그인 화면이 새로 등장 -> 토큰을 요청하는 코드
    func scene(_ scene: UIScene, openURLContexts URLContexts: Set<UIOpenURLContext>) {
        NaverThirdPartyLoginConnection
        .getSharedInstance()?
        .receiveAccessToken(URLContexts.first?.url)
    }
⚠️ m1 맥북 오류 발생
Could not find module 'Alamofire' for target 'x86_64-apple-ios-simulator'; found: arm64, arm64-apple-ios-simulator ‼️
⭐️ 해결 방법
- 사진처럼 내용 변경 및 추가

- xcode - Product - Clean Build Folder 클릭 후, xcode를 닫기
- 프로젝트 경로로 진입
sudo gem install cocoapods-deintegrate cocoapods-clean
pod deintegrate
pod clean
pod install
순서대로 입력

[참고]
https://levenshtein.tistory.com/396
728x90
'iOS' 카테고리의 다른 글
| [RC_week7-8] iOS 아이디어스 클론 코딩 (0) | 2021.08.12 |
|---|---|
| [iOS] m1 시뮬레이터 에러 해결 (0) | 2021.08.01 |
| [iOS] 컬렉션 뷰를 활용한 가로 스크롤 페이지 배너 (0) | 2021.07.30 |
| [iOS] 사이드 메뉴 (SideMenu 라이브러리 사용) (0) | 2021.07.29 |
| [iOS] 상단 탭바 (XLPagerTabStrip 라이브러리 사용) (0) | 2021.07.29 |